
;VENTILATION OR DEATH
One of the key issues in a campervan is removing water. Water being in lots of places that it shouldn’t be. No matter how well you insulate your van, there will be always be condensation surfaces. The vans themselves will always have little corners here and there that are poorly ventilated (mould hates ventilation).  Many things in a van add water.. c.900ml/day water is perspired/exhaled on average per person. So at peak occupancy over 8 hours, 2 people and one smallish collie will be adding well over a pint of water to a pretty small box.  Add to that wet clothes, washing up, cooking (for which ventilation is pretty important…)..
In general, the answer to this is more ventilation and massively overpowered heaters to compensate for the heat loss. This offends my sense of efficiency.
Enter, the heat exchanger!!  Theoretically, an air heat exchanger should perform a dual function in this use case. Remove water filled warm air from van, use it to heat incoming fresh drier air, save energy and fight mould. All this thing.
I found a chap had been working on a similar idea for a home made exchanger for a chilly flat. Someone else has done a lot of the work?? Get in.
Overengineering is for Winners
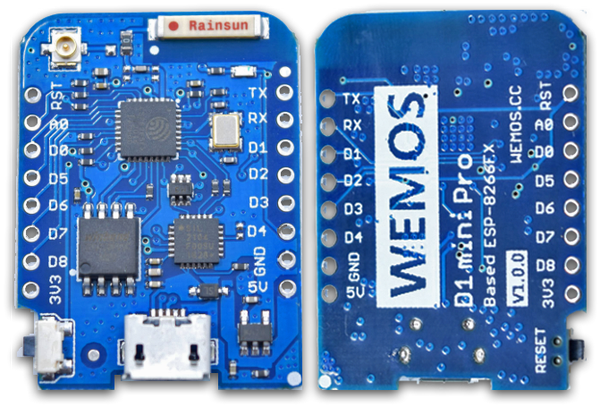
Whilst his design seems a good start for my needs, there are definitely some things that I want to add.  As this is going in the van, I need some wifi capability if I want to log the data nicely, so I’m using a Wemos Mini Pro as the base board for the project. This is a fantastic wee ESP8266 board that does wifi, talks arduino, and is basically made of pixie dust and wizardry.
Firstly, I’ll have to make adapters for the air inputs, because I printed the parts before realising I have 100mm air intakes with 54mm on the exchanger. no big deal, but won’t be as lovely.
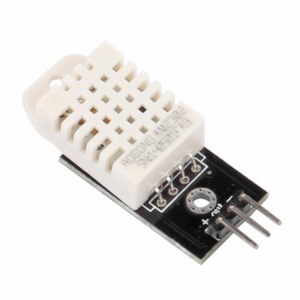
Secondly, I want to track humidity as well as temperature. For this purpose I purchased some DHT11 sensors.. and then promptly discovered that they are a bit rubbish, only do 1 degree granularity and apparently break in about two years of use max (I broke one already). I’ve ordered some BME280 sensors to swap in.
Note: The BME280 sensors arrived, and can only be set to one of two I2C addresses. This is problematic – without multiplexing them, I don’t have enough IO to talk to them over SPI. Â I have compromised for the sake of expedience and ordered some DHT22 sensors. Slightly less crap than the DHT11s, they have the advantage of being a straight swap with one tiny code change.
Third, I want to drive the fans automatically based on the sensor readings, and for this I’m using TIP120 Darlington Transistors to drive the 12v fans from the 3.3/5v board..
Fourth, I want some feedback. A related requirement is that I want some dimmer lighting for chilling with – the lighting I have currently is very efficient and bright and not terribly relaxing. So, I’m adding a small string of RGB LEDs to the board.
Pop on a couple of switches and we’re getting pretty maxed out on the IO. No matter, I think we’re done!
Lastly.. it’s not quite MaD sCiEnCe looking enough, is it? I think we can do better. I think we can.
The Build..
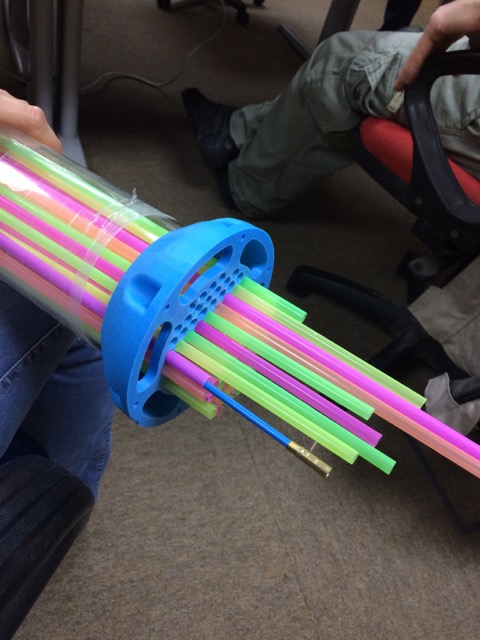
Assembling the main body of the heat exchanger was .. a little frustrating. After a few incidents – the last of which resulted in me staring into space and counting to a billion – I worked out a moderately efficient method using a bit of pole (and glueing the pox ridden ends on the tube. Most of a hackspace evening went on this, up to a gritted teeth finish at midnight when everyone was packing up around me..

Ready to install, v1 code pretty much done! Â The wemos takes data from the four sensors and posts it to an Influx database with a Grafana front end. Pretty, pretty graphs.
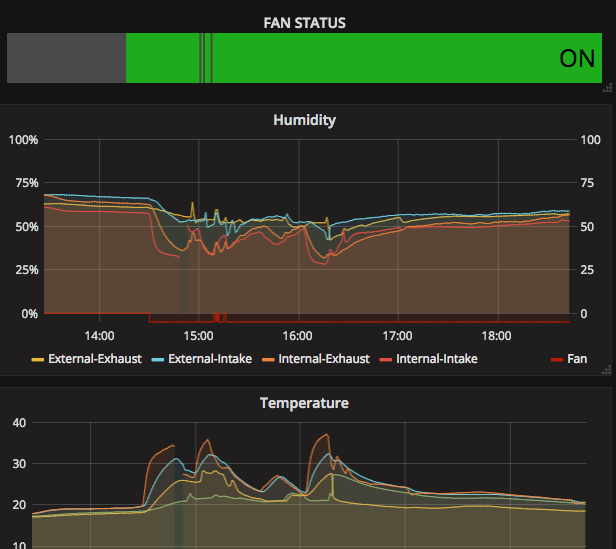
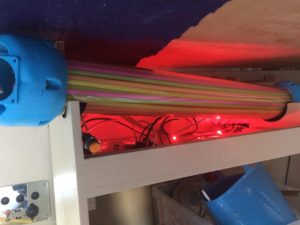
The code also controls a string of 6 LEDs, to provide a bit of calmer ambient light than the insanely bright overheads I installed. Â The lights flash red (off), blue (auto) and green (on) to show the fan status. Â Currently, auto just turns the fans on if the temperature or humidity in the van are high. At some point I will refine this to reflect the outside temperature etc.
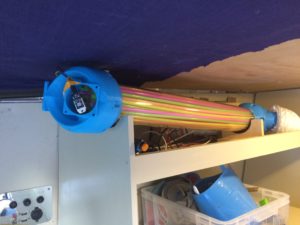
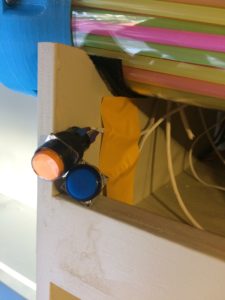
There are a number of issues with the design that don’t really mesh with being in a van – the ends are not easily attached firmly to the tube, the air intake/exhaust ports are designed for small 6cm fans – and my ducts are 10cm. At some point I’d like to redesign so as to eliminate all the mad flexible ducting and jerry rigged plywood fan holders – but I want to have it running for a while to see how it performs as is. I still need to make a nice switch panel, sort out the internal air intakes and tidy the wiring a bit for this iteration, in any case.
Hi, this is an awesome idea. Why hasn’t someone run with it before! Stale air, moisture and heat loss seem like no brainers for anyone living in or designing an RV/camper van. Cracking a window open and / or yanking a ceiling fan just sounds a bit unga bunga. An RV is essentially a tin can (pretty well sealed one at that) and not a bricks n mortar house. This demands a different mindset, surely. Anyhow, I’d be intrigued to hear how this project came along. Again, really like your concept, and engineering. Keep on truckin’! Shane
Hey Shane!
My anti spam system ate your comment, good old technology. So, some time down the line and I’d have to say it definitely does seem to do the trick. Keeps the evil damp demons at bay, stops it getting stuffy at night, doesn’t steal all the heat (at least not immediately anyway). On my list (oh the lists the lists) is v2 of the exchanger which will address some issues I had with this one – although it’s still working, it could definitely be better.
So, I’ve had similar ideas in my head around van MVHR for many years now and have only just got around to actually doing anything about it, as I never actually had the converted van that I was to be designing it for.
How has this system being going since your last comment? Did you ever get around to designing a v2?
I’ve been working on a slightly more conventional design shell and tube heat exchanger, with larger fans and baffling to hopefully improve efficiency and reduce build (and printing) complexity, specifically designed for small spaces (unlike most DIY MVHRs that are designed for houses).
I’d love to hear your comments based on your real world experience of such a system in a van.
(https://www.thingiverse.com/thing:4798023)
Hey Robin,
I think you are absolutely going down the right path there, although I’ve not actually done any real designing outside my head of the V2 exchanger, that design does build in a lot of the new ideas I had re fit, size, baffling and modularity, but the key points that I would say were important that vex me about this one are:
This design is complex, hard to print and absolutely inappropriate for a moving, flexing vehicle (it wants to fall apart a lot)
In order to get the drop for condensation removal, I had to angle it in a way that took up tons of space
There’s no built in mounts for sensors
The sensors that I fitted (the 22s) are crap and I have better ones, but haven’t as yet done anything about that..
Speed control on the fans for night time quiet air circulation
a diverter so I can do _just_ extraction when cooking.
If I’d been more efficient in lockdown I would have done it, but.. I wasn’t.
Keep me posted!
Tiff